| Project | Start Date | Comments | Finish Date |
| Lightbox for Manatee Stained Glass Piece | Designed in 1995 | Mahogany purchased and rough cut. | Finished 10/10/2000 |
| Updated:
10/21/00-It's finally done! The inside was painted
white to better reflect the light and the whole thing was spray
varnished with Varathane semi-gloss. The remaining padding and
light sealing rubber strips were put into place and the 3 florescent
light tubes were mounted and wired together. The manatee piece was
then clamped into place and the whole (heavy) thing was hoisted up on
the wall. The switch was flipped and the project was over!
See the final pictures at the bottom.
Updated: 9/18/00-Worked some over weekend, working doing glue-n-screw and making internal brackets to hold frame of glass piece in place. Posted new pics at bottom. 7/10/00-Worked Saturday and Sunday and made great progress. Posted a few new pictures at the bottom of this page. 5/21/00 - Didn't really have the right tools to do the dovetails for the box. Now that I have the jig and have actually used it (see Video Cabinet) that excuse has evaporated. |
|||
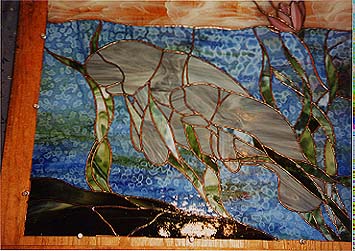
Under construction Manatees waiting for a lightbox. The manatee glass piece is actually finished (even thought this photo is an under-construction shot). This is actually the back of the piece.
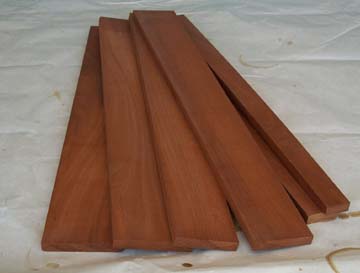
Pile of mahogany wood waiting to take shape. This was purchased so long ago, I had trouble finding the other 4 pieces.
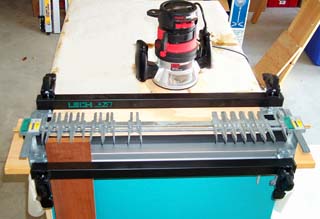 This
Leigh dovetail jig is what I used for the Video Cabinet drawers and it does a
great job. It was kind of intimidating with a 1" thick manual and
it's own instructional video, but for through dovetails like I've done so far,
it's pretty easy to understand.
This
Leigh dovetail jig is what I used for the Video Cabinet drawers and it does a
great job. It was kind of intimidating with a 1" thick manual and
it's own instructional video, but for through dovetails like I've done so far,
it's pretty easy to understand.
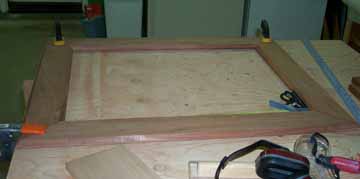 7/8/00-Construction
actually began. This is the face-frame begin worked on. It's like
building a really big picture frame, but if your angles aren't exactly 45, it
really shows up. Spent a little time tuning up the saw making the miter
cuts and using a picture frame trimmer to finalize the angles.
7/8/00-Construction
actually began. This is the face-frame begin worked on. It's like
building a really big picture frame, but if your angles aren't exactly 45, it
really shows up. Spent a little time tuning up the saw making the miter
cuts and using a picture frame trimmer to finalize the angles.
 Starting
to make sense here. The frame measures 35" x 29" and looks
deceptively small in this picture.
Starting
to make sense here. The frame measures 35" x 29" and looks
deceptively small in this picture.
 The
box has been built and the frame attached to it. This picture shows the
placement of the florescent tubes and the glass piece set in position.
Need to do a bit more work to make sure the heavy glass piece is supported and
won't move around. There will be 2 more tubes on the top and bottom and
depending on the glass piece, one or more will be lit to provide the proper
lighting. Each light will be independently selectable and then controlled
by a master switch.
The
box has been built and the frame attached to it. This picture shows the
placement of the florescent tubes and the glass piece set in position.
Need to do a bit more work to make sure the heavy glass piece is supported and
won't move around. There will be 2 more tubes on the top and bottom and
depending on the glass piece, one or more will be lit to provide the proper
lighting. Each light will be independently selectable and then controlled
by a master switch.
 Here
are the brackets to hold the frame in place. They are 3/4" maple and
a total of 12 wingnuts hold the frame in place. The frame rests on foam
insulation tape which seals in the light and also prevents wood-on-wood
contact. The glass piece is really stable when it is mounted in the
lightbox.
Here
are the brackets to hold the frame in place. They are 3/4" maple and
a total of 12 wingnuts hold the frame in place. The frame rests on foam
insulation tape which seals in the light and also prevents wood-on-wood
contact. The glass piece is really stable when it is mounted in the
lightbox.
 Here
is the recess above the fireplace where the lightbox will go. When
the house was being built over 3 years ago, we had them put in a switched outlet
(shown here) in anticipation of this project being finished. A friend of
ours accused us of putting in the outlet to power a neon bar sign. The bar
sign would have certainly been easier than this project...and would probably be
up by now. Note how Heimlich looks on approvingly from his vantage point
to the right of the frame...
Here
is the recess above the fireplace where the lightbox will go. When
the house was being built over 3 years ago, we had them put in a switched outlet
(shown here) in anticipation of this project being finished. A friend of
ours accused us of putting in the outlet to power a neon bar sign. The bar
sign would have certainly been easier than this project...and would probably be
up by now. Note how Heimlich looks on approvingly from his vantage point
to the right of the frame...
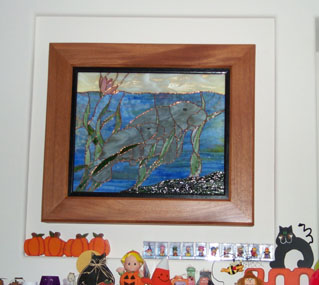 Here
it is! The light switch at the wall turns it on and it is beautiful!
Only 5 years to design and build, but well worth the wait. This is
officially a finished project now!
Here
it is! The light switch at the wall turns it on and it is beautiful!
Only 5 years to design and build, but well worth the wait. This is
officially a finished project now!
Yipee!